A look back to conservation in the field with Heritage New Zealand – Part One
© Tiaki Objects Conservation.
A number of years ago, while navigating the new terrain that came with being an emerging conservator, an opportunity to travel home to New Zealand and work with past colleagues at Heritage New Zealand, proved to be memorable and invaluable. In those early days, the very same colleagues at Heritage New Zealand, encouraged and supported, my crazy decision to move countries, no less, and pursue the wonderful world of cultural materials conservation. While this proved to be a fantastic professional development opportunity, it was also a chance for me to give back to an organisation whose continued support is partly responsible for the conservator I am today.
Te Aro Pa, Wellington, New Zealand – November 3 – 7, 2014
In November, I travelled to Wellington, New Zealand to participate in a number of workshops with Heritage New Zealand Pouhere Taonga. For three weeks, I worked closely with the Built Heritage Conservator, and the Cultural Arts Advisor on three separate projects, back to back in three separate regions of the north island of New Zealand.
Heritage New Zealand works in partnership with others, including iwi (larger community group) and hapū (family groups), local and central government agencies, heritage NGOs, (non-governmental organisations), property owners, and volunteers, and provides advice to both central and local government, and property owners on the conservation of New Zealand’s most significant heritage sites. Heritage New Zealand employs specialist pouārahi (Māori Heritage Advisers) and other regional staff based throughout its regional offices.
The workshop took place in Wellington, located at the bottom of New Zealand’s north island. It involved the assessment of Te Aro Pa archaeological site, situated in Wellington’s CBD. In November, 2005, work on a multi-million-dollar high-rise development in the heart of Wellington city was suddenly halted when foundation work for the new building uncovered the remains of a ~200-year-old pa site. The archaeological remains of the three ponga structures were discovered during demolition for the redevelopment of the site. The discovery forced a re-design, constructing the foundations of the building around these sites – the new design integrating the sites into the foundation, which allows for a rocking like motion in the event of an earthquake. The archaeological site is a block south of Wellington’s iconic waterfront and the Museum of New Zealand Te Papa Tongarewa.
Image 1 – Te Aro Pa (foreground) archaeological site, preserved in situ. View towards the street from the ground floor of the building. © Tiaki Objects Conservation.
During 2013, earthquakes caused substantial damage to property and buildings throughout Wellington’s CBD. Te Aro Pa site, the apartment building above, and many buildings surrounding the site, suffered varying degrees of damage. The site is of archaeological, architectural, cultural, historical, social, and traditional significance due to its association with early Wellington and North Island iwi, the archaeological rarity of the site, the educational value of the place and as an example of early Maori residential architecture.
Image 2 – Remains of uprights of the whare, along the northern most part of the west wall. © Tiaki Objects Conservation.
Image 3 – foundation remains of the south wall of the whare. © Tiaki Objects Conservation.
Before the site was uncovered, ponga whare (houses made of tree fern posts) were known to exist, however finding remains of this kind are very rare in New Zealand. The plant material deteriorates rapidly in humid/moist environments. This site however, is extremely dry and is a dense, compacted aggregate of marine pebble and both course and finely ground mineral particles, which has proved beneficial to the preservation of the site. Materials of varying occupation. i.e. plate fragment and terracotta pipe, constitute part of the site, as evidence of change and the varied uses of the site through time.
Condition of the whare
A large structural crack had formed through a portion of the south wall and large fragments of the uprights previously treated with Poly-Vinyl Butyral in ethanol, had either detached or were detaching along the southern most part of the east wall. Slumping along the east wall was also apparent and a substantial amount of surface material had moved. The outer wall around the northern most part of the east wall and the north wall had slumped slightly and small sections of the wall had detached. Also, spiders, while at first thought harmless, had spun webs behind the plate shard – the webbing attaching to some of the structural remains of the uprights along the northern most part of the west wall.
Original consolidation treatments to the site employed the use of ~5% w/v Poly-vinyl butyral or PVB in ethanol. This resin was chosen for its strength, flexibility, ability to bind to most surfaces and excellent optical clarity. The consolidant allowed for the hardening of the original non-treated surface while securing fragile ponga remains into the surrounding marine gravels, providing structural support to ponga material in its original position.
Treatment methodology
Based on the previous treatment regime, we tested a lesser concentration of 3% w/v on the non-original surfaces around the pit using a spray bottle. It was hoped that by lessening the concentration, the risk of introducing too much solvent to the affected area, then re-solubilising previous consolidation would be reduced. However, the very presence of the solvent small fragments to begin dislodging.
Image 4 – testing application of consolidant on aggregate material in the site. © Tiaki Objects Conservation.
Research and treatment testing had been successfully undertaken by a conservator at Museum Victoria during this time - the finely ground minerals which made up a large component of the site material, had a similar composition to powdered ochre so, so we decided to test a 1% and 2% solution of methylcellulose. Our initial test equipment involved syringing directly to the desired area. The 2% solution penetrated approximately 15-20mm with an approximate circumference of 10-15mm. It bonded well with all components of the aggregate, there was very little colour change and more importantly no visible gloss. Also, it was easy to prepare and non-toxic! Success!
Image 5 – Preparation of consolidant for testing. © Tiaki Objects Conservation.
Image 7 – Tools of the trade – adapting locally available materials for use in the site. © Tiaki Objects Conservation.
Image 6 – ‘Test pieces’ of aggregate using methylcellulose. © Tiaki Objects Conservation.
Image 8 – application of consolidant through our ‘weed sprayer’ applicator. © Tiaki Objects Conservation.
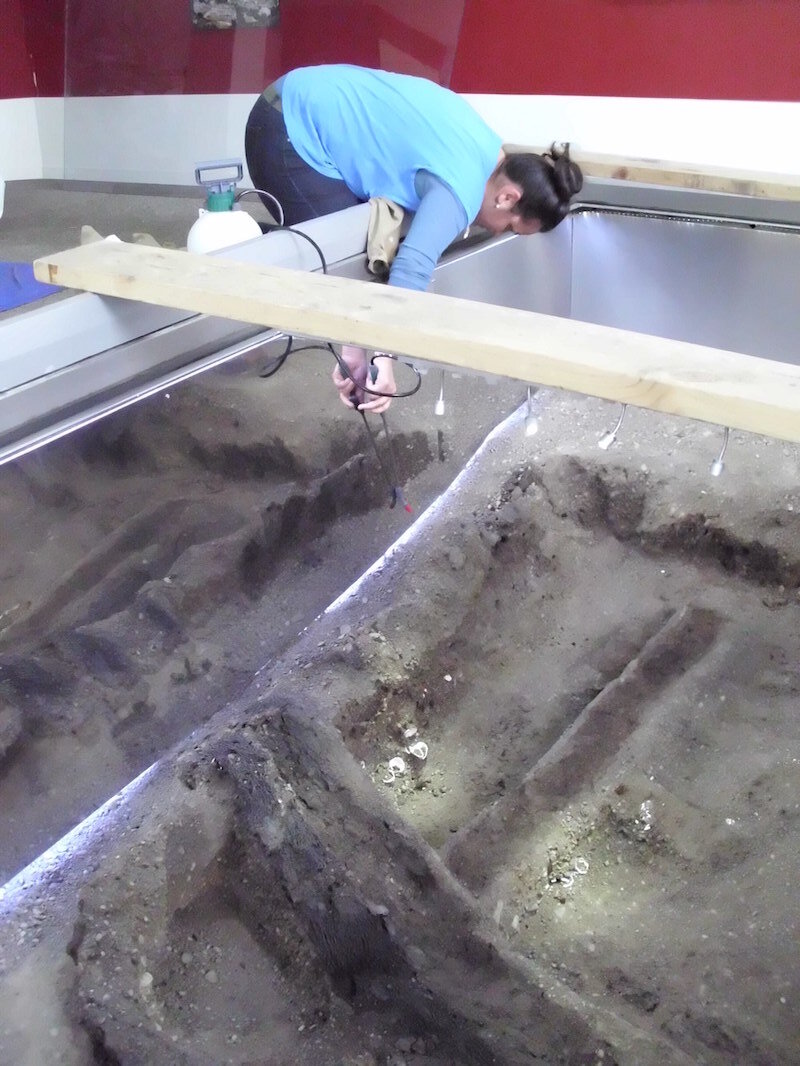
We had little success with the 1% solution. The next step was to figure a way to apply this consolidant to a larger surface area, that was practical and which would not disturb the loose surface too much. We aimed to replicate a mist-like application as best as possible given our location and availability of resources. Off to the local hardware we went where we purchased a number of different sized spray bottles – and what became our most valued tool, the humble weed sprayer. After a few adjustments and a bit of innovation, ensuring our viscosity was about right, then figuring out the amount of pressure to apply to the trigger, we were able to apply our ‘misted’ consolidant to the outer surfaces of the foundation walls using the repurposed weed sprayer. Using a pressurised sprayer meant we were able to apply this in an even, consistent stream, over a large surface area.
Image 9 – Hanging over the edge of the pit to apply the consolidant to the foundations of the site. © Tiaki Objects Conservation.
Image 10 – consolidant applied to the outer edges of the foundations of the whare. The reflective wall indicates where the consolidant has been applied. © Tiaki Objects Conservation.
Water was first sprayed as a barrier layer, which moistened the surface and allowed for more permeation and adsorption of the consolidant. I was able to direct the wand towards very narrow sections of the site and to parts of the underside of the outer walls without getting into the pit!
The treatment time, including pre-spraying with water was approximately 5 hours - a long time to be hanging over upside down!
Wellington was experiencing a colder than usual spring that year, with the temperatures not rising above 11 degrees for most of the week we were there. Coupled with bitter cold southerlies that Wellington is famous for, the environment inside the gallery did not provide optimal drying conditions. It took approximately three days for the site to dry.
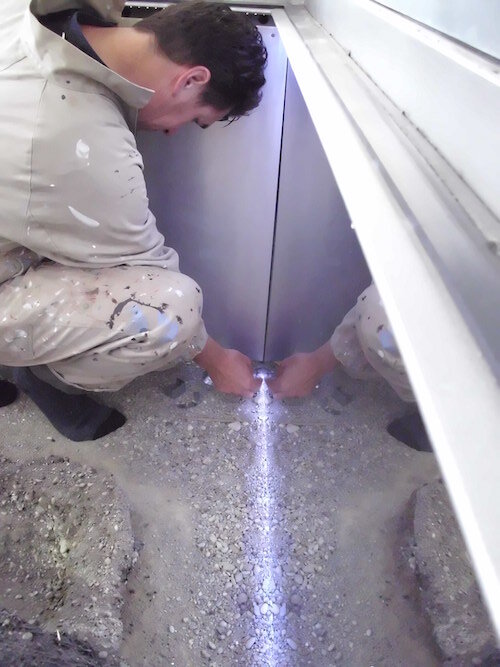
Image 11 – repair of strip lighting around the base of the pit. © Tiaki Objects Conservation.
Image 12 – LED down lights that had dislodged during the quakes, required reattachment to the centre panel. © Tiaki Objects Conservation.
Cosmetic treatments involved repairing LED strip lights which had become detached during the quakes. These lights were attached to the central panel and beneath the mirrored walls around the outer edge of the pit. We fashioned galvanised metal strip brackets to clamp the lights along the central panel and u-shaped brackets which were wedged between the lower edge of the mirror walls and the gravel. The brackets were painted with acrylic to match the rusty colour of the large metal sheets behind the mirror walls. These were packed in with gravel to secure in place. Unfortunately, we had to evict our tenants, so the spiders and their webbing, which we also found more of throughout the site, were sprayed with pyrethrum and delicately removed using small spatulas and tweezers to mitigate any unnecessary disturbance.


